
Managing Glue Space Templates
Under the Spaces tab there is a Manage templates tool that can be used to:
Create a new template.
Edit/update templates.
Edit or add a description to a template.
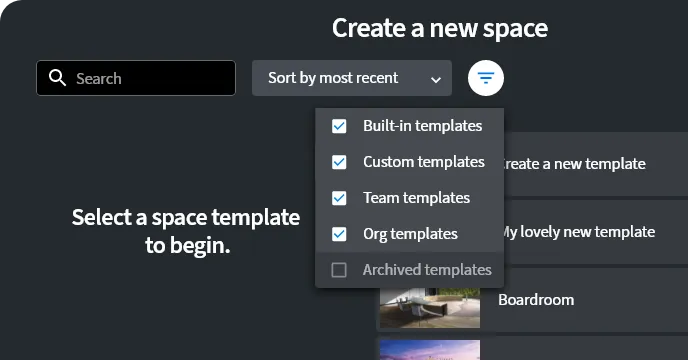
Archive a template. Archiving will hide the template and prevent new space created from it. This can be reversed by clicking the filter button, choosing to display archived templates (by default this is off), and unarchiving.
Promoting template to be usable at the organization level. (available only for the organization administrators). This will enable the usage of the chosen template throughout the whole organization. Use this carefully, currently, it can not be undone.

Updating space template
1. Under the Spaces tab choose Manage templates tool.

2. Choose the template you want to update and under the three dots choose Edit.

3. Here you can:
Rename your template
Change the thumbnail image
Import a new template asset package.
4.Once done, click save

Advanced Options
By expanding the “Advanced Options” foldout, you’ll find an option to specify a scene asset per platform, or “None” if you do not intend to support some platform(s).
Important! Glue Spaces instantiated from a template with missing platform-specific assets will be inaccessible to users on those platforms.

Partial builds can be useful for speeding up development time iteration on your Glue Space Template. However, this feature should be approached with care regarding production use, to not lock any users away from your Glue Spaces.
It is strongly recommended to always have all three build targets configured.
The real power in platform-specific assets lies in an opportunity to provide optimized variants of your scene for each platform (less detailed for standalone VR devices, more detailed for state-of-the-art Windows VR PCs).
Regardless, all Scene Assets intended to be packaged together into a Glue Space Template must have the same scene name and must therefore be located in separate folders under your Unity project folder structure.
Picking Scene Assets
Scene Assets can be dragged from the Project window into the builder input fields. Alternatively, clicking on the round icon at the right-hand end of each input field will open up a separate Scene Asset selection dialog.
You cannot directly drop a Scene (as this is different from a Scene Asset) from the Hierarchy window into the input fields. Instead, click on the three-dot context menu of the Scene and pick “Select Scene Asset”, this will highlight the asset file in the Project window and you can drag & drop it from there.

