
3D Model Import Guidelines
Learn how to import 3D models to your Glue Team.
What files does Glue support for importing 3D geometry?
FBX: Glue supports any 3D model in the current FBX file format. The current supported FBX format versions are from FBX 2011 to FBX 2020.
OBJ
STL
GLTF 2: .gltf or .glb. Needs to be one file with everything extra, like textures, embedded.
GLB
PLY
3MF
For cross-platform compatibility, do not to exceed 250 000 triangles, good practice is to aim below 50 000. Consider, however, that for optimal performance with your particular hardware and use case the specification may need to be a little more elaborate than that.
How do I convert my 3D objects?
Most 3D packages have FBX available as an export format to convert your 3D model to. Refer to the user manual for specific instructions with your selected software. If you don’t already have software capable of file conversions, there are several free or low-cost alternatives available. A good and free option with plenty of good tutorials is Blender, which is available for download at: https://www.blender.org.
While it’s always advisable to study the documentation of the software to be used, you can ensure textures are embedded in the exported FBX file with Blender with the following FBX export settings:

It is also a good practice to center your model in the coordinate origin of your 3D program before export. This way it will more likely be easily visible in Glue even if the orientation of the model or scale turns out to be different in Glue than it was in your 3D program.
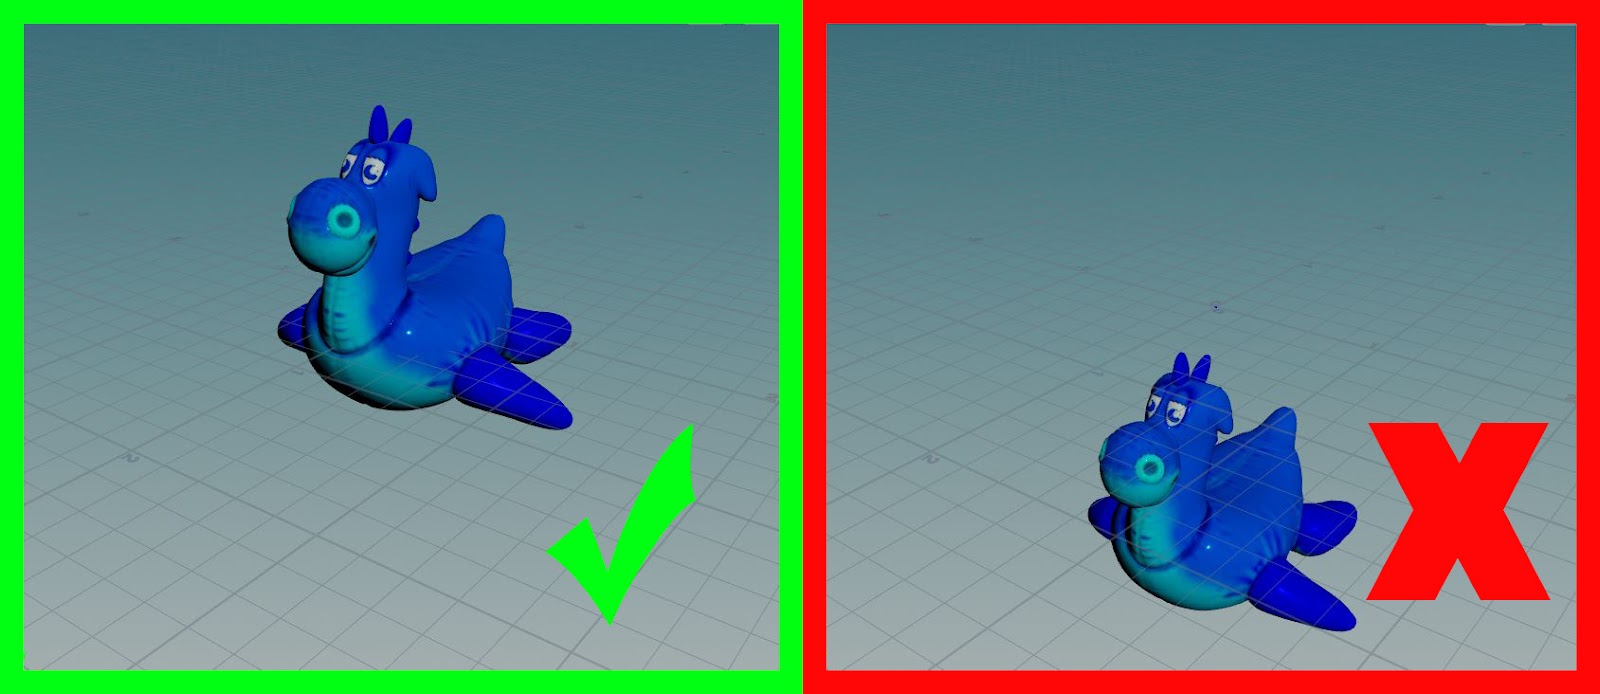
On the left the model is centered in the origin of the 3D program's coordinate system, like it should. On the right it is below the origin and there’s a risk it might appear under the floor when imported to Glue.
Why is there much more to it than just file format?
Glue supports a wide range of hardware combinations, many of which will be used in a single shared session. In addition, the potential use cases for importing 3D geometry vary greatly in different industries. As a result, it is impossible to set just a single platform-wide specification or hard limit for imported objects that caters to them all.
Untextured design models are significantly less demanding for hardware performance than objects with complicated and realistic materials. Dividing geometry into separate parts improves performance as geometry not currently in the field view isn’t rendered. This holds true until the sheer amount of objects becomes too demanding to solve in real time. The same object instanced multiple times requires less memory than several unique ones.
Additionally, other factors such as the number of participant avatars in session, the chosen Team Space environment, and any other software you are running during the collaboration session have an impact on how much imported geometry can run smoothly.
Ensuring optimal real-time performance across the hardware of your users will be something of a balancing act: the different elements that ultimately make up your imported 3D model will affect performance in different ways, and you may have to make trade-offs. While there is no one simple specification for imported 3D models beyond file format, we do provide a set of guidelines, benchmarks and a graph to give you an idea how to utilize this feature best for your particular use case.
A gentle warning: use your power wisely
We could have applied limitations on 3D models to allow only those that work with low-powered standalone devices. After careful consideration, we’ve decided not to do that. We want the feature to be completely open-ended to also serve the power users in the design and manufacturing industries equipped with high-end computers and powerful GPUs that are able to handle highly detailed geometry with ease.
Of course, we do acknowledge that everyone do not have high-end machines. If you have participants attending sessions using lower-GPU systems, you should ensure your imported models and objects are not going to exceed their hardware capabilities.
Mobile devices like Meta Quest or other lower performance systems might suffer serious frame rate reduction or even system crashes if overly complex geometry is imported into the space. Users with lower-performance devices will not be able to enter a space at all before objects that are too demanding are removed using a more powerful device.
Users with limited internet bandwidth will also experience longer loading times in spaces with complex imported objects. We strongly recommend that you’re conservative with the number of polygons and/or number and resolution of texture maps, especially with standalone devices.
Imported object best practices and file specification
Most of the specifications below apply to any real-time graphics, such as those used in games, and are not specific just for Glue. We take optimization seriously so there isn’t that much overhead to run Glue despite the powerful features it has. However, it is possible to import overly heavy geometry into Glue and depending on the graphics capabilities or other processes running on the users’ equipment, varying degrees of performance issues might occur. On the other hand, if all participants have top notch gaming desktops and high-speed internet connections, somewhat complex objects can be imported with no noticeable drop in performance.
File format: FBX 2011 or newer. Legacy FBX V6.0-files are not compatible.
Keep everything as simple and small as possible.
Scale must be in centimeters.
Textures must be embedded in FBX or GLTF files.
Consolidate as many objects as possible into a single mesh. If an object consists of more than 100 separate geometries, it might start to cause performance lag. Dividing large objects to separate meshes will improve performance as geometry that isn’t in the field of view doesn’t have to be rendered at all.
Keep polycount reasonable. The maximum number of polygons depends on the equipment used. For an untextured single object, it’s recommended that the number of triangles does not exceed 250 000 for lower-end GPU machines, 1 000 000 for a generic business laptop and 10 000 000 for high-end desktops with a powerful GPU. In any case, whenever possible, it’s advisable to keep the polycount as low as possible.
Avoid excessively high-resolution textures and use as few separate texture maps as possible to keep the memory consumption reasonable. For lower-end devices try not to exceed 512 pixels (1 024 will run though); for high-end devices, the maximum is 4 096 but
2 048 is recommended.
If possible, combine all textures into one texture atlas. This improves performance significantly.
Bear in mind that processing lots of poly objects – even low poly ones – imported into space might start to affect frame rate. For example, if you import 10 000 low poly objects, it can freeze the space.
Check that surface normals are uniform. As geometry is rendered one sided (outside) any polygons with inverted normals will appear as holes.
Depending on the software you use to export your 3D file, some material properties like “Metallic” may not be transferred.
Benchmarks

Standalone device (Meta Quest, Pico Neo, Vive Focus):
The absolute limit for one single object is 250 000 triangles. Make sure you count triangles.
Quest was able to render 70 untextured object copies, each consisting of 20 000 triangles.
A crash results with approximately 60 instanced 1 100 triangle objects with 1 024k texture.
A crash results with a 300 000 triangle untextured object.
Generic standard business laptop:
• The limit for acceptable performance for one single object is 1 000 000 triangles.
• Performance starts to slow with 220 objects with 1 024k texture. VR would likely be quite laggy but still usable. A 1.2 million + 300 000 triangle object (no texture) running but gets slower.
• A crash results with 8 000 000 triangle untextured object.
High-end PC:
• Perfect performance with 220 textured objects.
• 1.2 million + 300 000 triangle object. No lag. • No lag at all with an object of more than 10 million triangles. Computer fans are much louder though!
• No crash point was found, but naturally it is eventually possible to overburden any computer
Model optimization, practical example.
Let's say we have a model of a fence that we want to optimize for use in Glue.
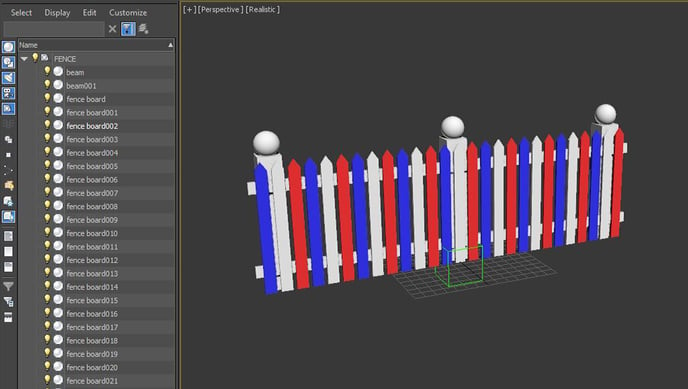
It consists of 32 individual parts or objects as we usually refer to them. It also has 3 materials, one for each color. And the polygon count at 3480 triangles is fine for realtime use on stand alone devices.
If we were to use this model in Glue it would consume one draw call for each object/part multiplied by the number of materials per object. So if one object has two materials it will consume 2 draw calls. This is not optimal. We want to use as few draw calls per model as possible.
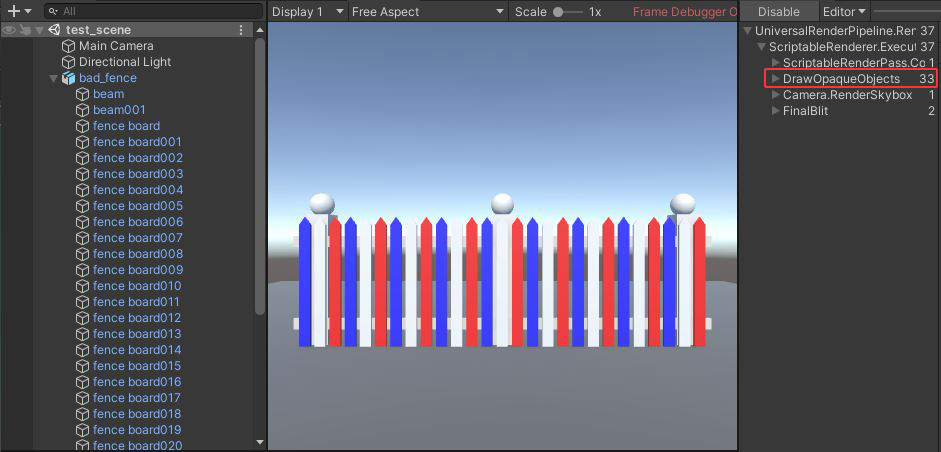
In this case we only have a single material assigned to any one object, so we would consume 32 draw calls for this model (+1 for the ground).
Combining objects
To reduce the amount of draw calls needed, we can combine objects in a 3D program. In this particular case we have no use for separation between individual objects so we can combine all of them into a single object. This will reduce the amount of draw calls needed for the model from 32 to 3.
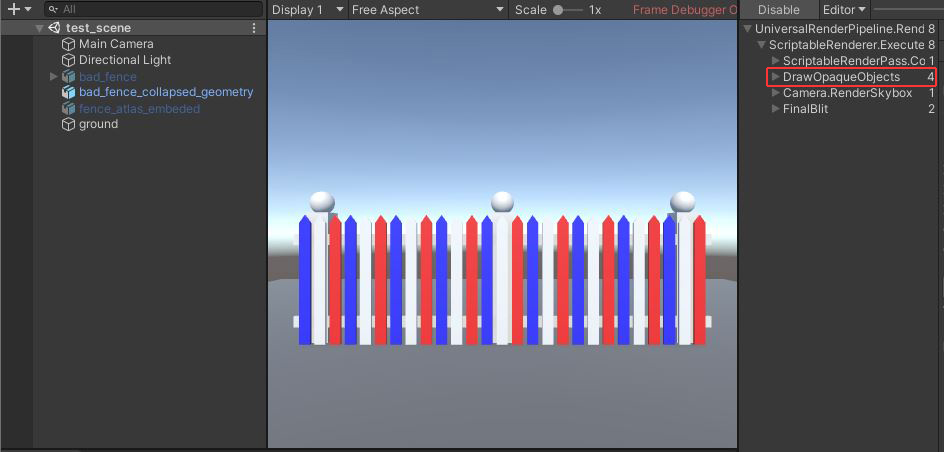
1 object x 3 materials = 3 draw calls (+1 for the ground).
This is already pretty good, but we can further optimize by reducing the amount of materials to one.
Combining materials
To combine materials we can use a small 256 x 256 pixel texture that has all the colors we need for this model and UV map each object to the area of that color in the texture. This is usually referred to as an atlas map. This can be made either by hand or using a baking function in the 3D program used. For more information about texture baking refer to your 3D program's user manual.
In a similar fashion we can also transfer other material properties to a map if needed.

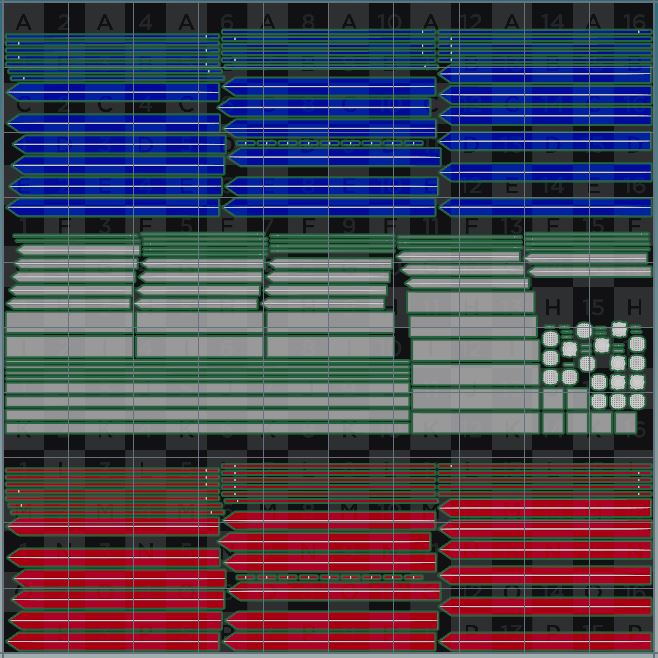
Atlas map for our fence model on the left and UV layout to assign the colors on the right.
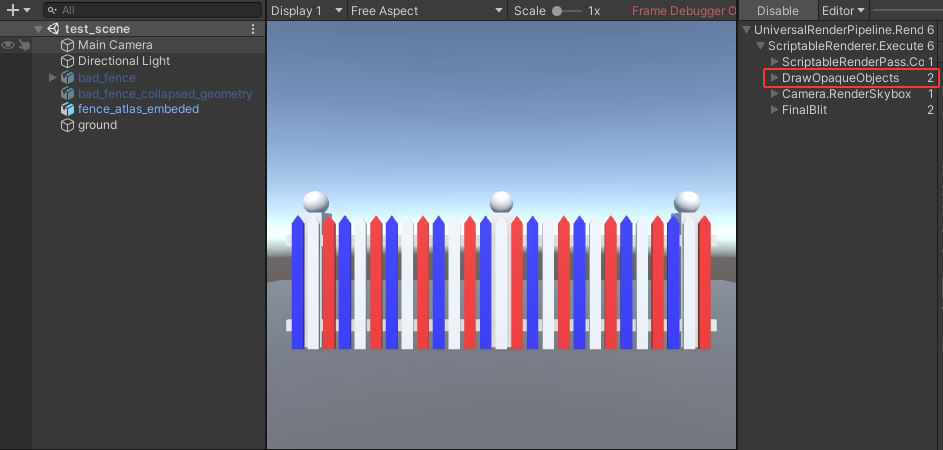
Our optimized model is now using only 1 draw call (+1 for the ground).
